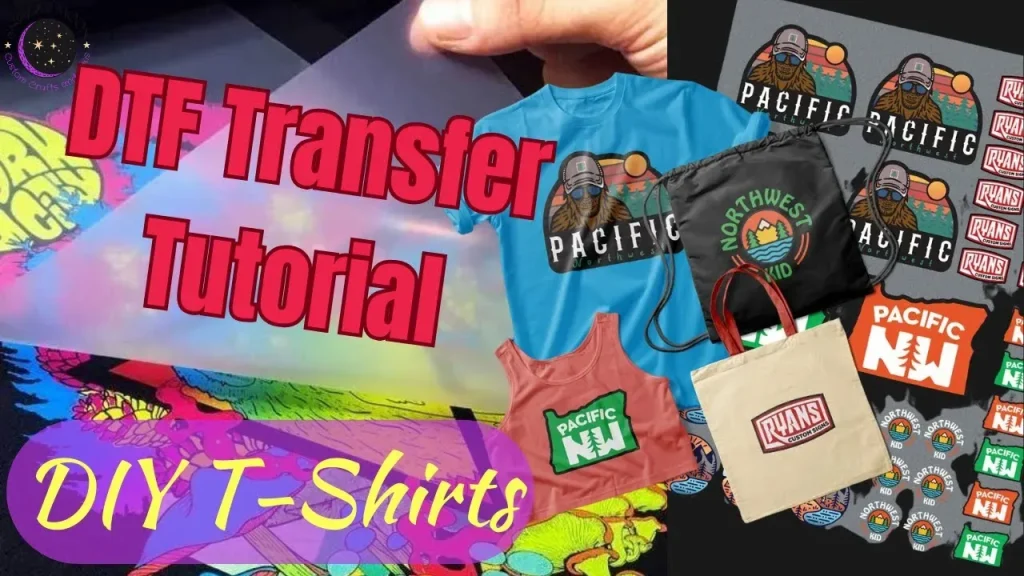
DTF transfers for DIY apparel offer a versatile, cost-effective path to vibrant, durable designs on cotton, blends, and even some synthetics. As you explore direct-to-film printing options, you’ll appreciate how these transfers empower DIY apparel projects with high detail and full color. This introductory guide covers what DTF transfers are, why they work well for home crafters, and how to use them with your heat press techniques for best results. From fabric compatibility for DTF transfers to choosing the right materials, you’ll find practical tips that help you achieve professional-looking garments. Whether you’re printing a single shirt or stocking a small home business, these transfers offer reliable, vibrant outcomes that hold up to washing.
In other words, this film-based printing approach uses a printed image on a translucent coating, then binds it to fabric with heat and pressure. Commonly called direct-to-film processes, it mirrors traditional heat transfer methods but delivers sharper detail, richer color, and greater design versatility for DIY enthusiasts. Think of it as a digital-to-film workflow, where artwork is prepared in software, printed onto a specialty film, and then fused to fabrics such as cotton and blends. Choosing compatible fabrics and testing the setup are still important, but the method is adaptable to a wide range of garment projects from tees to totes. By understanding the core steps—printing, powdering, curing, and pressing—crafters can achieve durable, detailed results without the need for traditional screen printing.
DTF transfers for DIY apparel: why home crafters choose direct-to-film printing
DTF transfers for DIY apparel enable home crafters to produce vibrant, full-color designs with high detail using a direct-to-film printing workflow. By printing artwork onto a specialized film with CMYK inks, applying an adhesive powder, and curing it before transferring with a heat press, you can achieve durable images on a wide range of fabrics. This approach supports gradients, fine lines, and complex color builds that are often challenging with traditional methods, making it appealing for personal projects and small-scale DIY ventures.
For hobbyists and small businesses alike, the appeal lies in tooling that remains accessible and costs that stay reasonable. You can work on single shirts or batches without a screen printing setup, and you gain design flexibility in placement, color choices, and background adjustments. This makes DTF transfers a versatile option for DIY apparel, tote bags, hoodies, and other items where professional-looking results at home are the goal.
Getting started at home: essential tools for direct-to-film printing
A reliable CMYK pigment ink printer capable of printing on DTF film, along with high-quality DTF transfer film, forms the foundation of a home setup. Add adhesive powder designed for DTF, a curing unit or heat source to fix the powder, and a heat press or sturdy heat press table to transfer the image onto fabric. Protective layers such as a silicone sheet or Teflon sheet help prevent scorching, while lint rollers, a ruler, and low-tack tape keep designs aligned during pressing.
Beyond the core equipment, a clean, organized workspace helps maintain consistency. Prepare your fabrics with a quick pre-wipe or light steam, keep spare transfer films on hand, and maintain your press temperature and dwell time according to the film manufacturer guidelines. Regular maintenance—calibrating heat, checking for uneven pressure, and inspecting films for dust or static—will improve color fidelity and overall durability of your DIY projects.
Fabric compatibility for DTF transfers: choosing fabrics for best results
DTF transfers work well on a variety of fabrics, including 100 percent cotton, cotton blends, and some poly blends. When working with different fibers, expect variations in color brightness, texture, and stretch. Starting with clean, pre-shrunk fabrics helps ensure crisp edges and consistent adhesion, especially in areas with difficult textures or nap.
For darker fabrics, plan for a white or lighter base layer to support vibrant color readout. Consider fabric selection and color balance early in the design process to keep images legible from a distance. Thoughtful base colors and contrast can enhance readability and reduce ghosting, while avoiding fabrics with heavy nap or textured surfaces in intended sharp-edge areas.
From design to garment: step-by-step workflow using heat press techniques
Start with high-resolution artwork (300 dpi minimum) and decide if a mirror image is needed. Print the design onto DTF film with your CMYK printer using the approved profile for your film, then apply adhesive powder while the print is still tacky. Cure the powder to fix it to the film before moving to the next step.
Prepare the garment by removing wrinkles, placing it on the press platen, and aligning the transfer with masking tape or markers. Cover with a silicone sheet or teflon barrier, then press at the recommended temperature and time for your film and fabric—commonly around 300–320 degrees Fahrenheit for 15–20 seconds. After pressing, peel the carrier hot or cold as instructed, and perform a post-press if needed for maximum adhesion. Allow the garment to cool and inspect for misalignment or edge issues before committing to full production.
Color fidelity and image quality in DTF transfers: optimizing for vibrant results
Achieving consistent color with DTF transfers relies on careful color management, from artwork preparation to printing and curing. Use high-quality DTF film and pigment inks, and consider a base layer on dark fabrics to preserve brightness. A properly prepared design at 300 dpi with accurate masking can help maintain sharp edges and smooth gradients across cotton and blends.
Printing profiles and test runs are essential to achieving the desired look. When needed, apply extra prints or a background base to stabilize tones on challenging fabrics. Keep in mind that fabric compatibility and base colors influence how vivid the final transfer appears, so plan your color palette with LF/DF considerations and step through test swatches before full-scale application.
Troubleshooting, care, and long-term durability of DTF transfers for DIY apparel
Even with a solid setup, issues like color bleed, ghosting, or edges that don’t adhere well can occur. Verify that the transfer film and adhesive powder are compatible with your fabric, and confirm the temperature, dwell time, and pressure match the film’s guidelines. Ensure the garment lies flat during pressing to avoid warping that can cause misalignment.
Care and longevity hinge on proper curing, washing, and drying practices. Turn garments inside out, wash in cold or warm water with mild detergent, and avoid high dryer heat or harsh solvents. Air drying or low-heat tumble drying helps preserve adhesion and color. With consistent care and regular maintenance of your heat press and materials, DTF transfers for DIY apparel can remain vibrant through many wear-wash cycles.
Frequently Asked Questions
What are DTF transfers and why are they a good option for DIY apparel?
DTF transfers, or direct-to-film printing, let you print full-color art onto a special film, apply an adhesive powder, and transfer the image to fabric with a heat press. They’re ideal for DIY apparel because you can reproduce gradients and fine detail at home, work with cotton, blends, and some synthetics, and avoid a traditional screen printing setup.
What equipment do I need to start with DTF transfers for DIY apparel?
Essential gear includes a CMYK pigment printer capable of printing onto DTF film, quality DTF transfer film, adhesive powder, a curing unit or heat source, a silicone or Teflon barrier sheet, a reliable heat press, and basic prep tools like a lint roller, ruler, and low-tack tape. This setup supports DIY apparel projects using DTF transfers.
Which fabrics are compatible with DTF transfers for DIY apparel and how should I prep them?
DTF transfers work well on 100% cotton, cotton blends, and some poly blends. Start with clean, pre-shrunk fabrics and avoid heavy nap or textured areas for crisp edges. This fabric compatibility for DTF transfers helps ensure color clarity and durability in DIY apparel projects.
What is the step-by-step process for applying DTF transfers for DIY apparel using heat press techniques?
Key steps include designing a high-resolution image, printing it on DTF film with CMYK pigment inks, applying adhesive powder and curing it, preparing the garment, placing the transfer with a barrier sheet, pressing at about 300–320°F for 15–20 seconds, peeling the carrier when instructed, and performing a post-press if needed before cooling and inspecting.
What common issues can occur with DTF transfers for DIY apparel and how can I troubleshoot them?
Common issues include color bleed, ghosting, and edges not adhering. Troubleshooting tips: ensure proper film and powder application, use the correct temperature and time for your fabric, keep the garment flat and dry during pressing, verify correct carrier peeling, and perform a test on scrap fabric before full production.
How should I care for garments with DTF transfers for DIY apparel to maximize durability?
Care for these garments by turning them inside out, washing in cold or warm water with mild detergent, and avoiding high heat in the dryer. Air dry or tumble on low heat, and avoid harsh solvents or bleach directly on the print. With proper care, DTF transfers for DIY apparel can last through many washes.
| Section | Key Points |
|---|---|
| What are DTF transfers? | DTF stands for direct-to-film transfer. You print artwork onto special film using CMYK inks, apply adhesive powder, cure the powder, and transfer with a heat press. Results are full color, high detail on many fabrics. For DIY, they offer complex image reproduction, home setup viability, and consistent results across fabrics with flexible design placement. |
| Why choose them for DIY apparel? | Enables at-home production with modest equipment, supports complex gradients and fine lines, and works on a range of fabrics. Ideal for T-shirts, hoodies, tote bags, and more with durable, professional-looking results. |
| What you need to get started | CMYK pigment printer capable of printing on DTF film; high-quality DTF transfer film; adhesive powder; a curing unit or suitable heat source; silicone or Teflon sheet; heat press; lint rollers; ruler or T-square; low-tack masking tape. |
| Fabric & design considerations | DTF works on 100% cotton, cotton blends, and some poly blends. 100% polyester can yield brighter colors; use clean, pre-shrunk fabrics; avoid heavy nap in areas needing crisp edges; plan base colors to keep design readable from a distance. |
| Step-by-step at home | 1) Prepare high-resolution artwork (min 300 dpi). 2) Print on DTF film with CMYK pigment inks; mirror if needed; use correct profile. 3) Apply adhesive powder to tacky print. 4) Cure the powder. 5) Prepare garment and align transfer. 6) Press with barrier and the recommended temp/time (e.g., ~300–320°F for 15–20s). 7) Peel carrier hot or cold per film instructions. 8) Post-press if needed. 9) Cool and inspect; test on a sample if unsure. |
| Durability tips | Test prints first; use quality film and powder; manage color (some colors need extra passes or base layer for dark fabrics); consider a white underlay for dark fabrics; keep the garment flat during pressing; maintain the heat press. |
| Troubleshooting | Address color bleed, ghosting, or poor edge adhesion by verifying film/powder application, correct temp/time for the fabric, and a flat, moisture-free garment. Revisit curing and ensure compatibility with the fabric. |
| Care & longevity | Turn garments inside out; wash cold/warm with mild detergent; air dry or low-heat drying; avoid bleach, solvents, and direct fabric softeners on prints. Proper care extends durability across washing cycles. |
| Best practices & caveats | Choose materials carefully, prepare a clean base, and follow a proven pressing routine. Key factors are fabric choice, proper curing of the adhesive powder, accurate alignment, and consistent heat. Start with practice runs, keep spare films, and maintain a clean workspace to prevent issues. |
Summary
DTF transfers for DIY apparel open up a world of creative possibilities for customizing garments at home with vibrant, durable results. This overview highlights what DTF transfers are, their advantages for home crafters, and the practical steps and best practices to get pro-looking results without a screen printing setup. By understanding the process, gathering the right tools, and following care and troubleshooting guidelines, you can confidently create long-lasting designs on a variety of fabrics using DTF transfers for DIY apparel.

