DTF transfers troubleshooting: Quick fixes for common issues

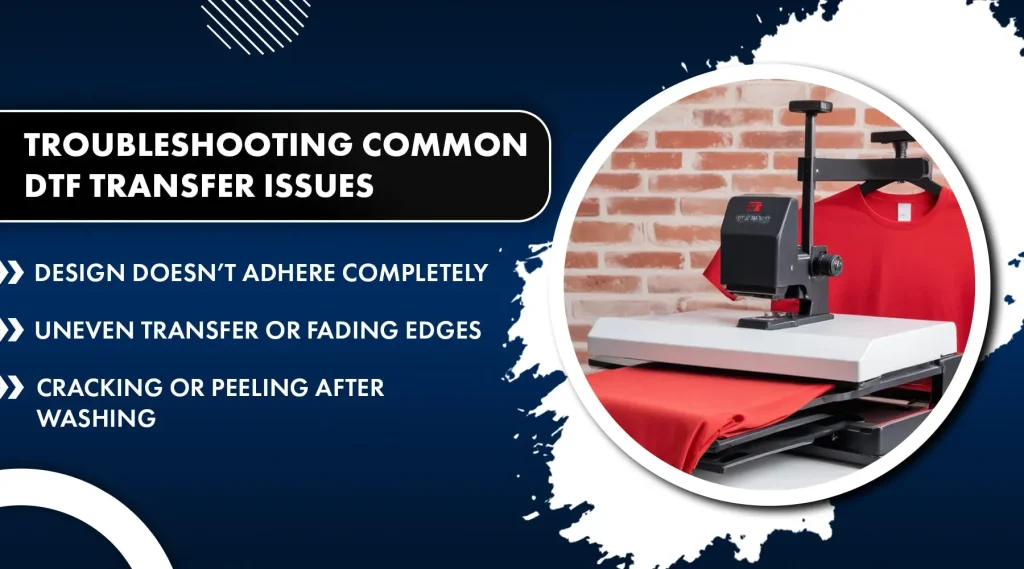
DTF transfers troubleshooting is essential for anyone using a direct-to-film workflow, whether you’re printing on cotton, blends, or synthetics, because reliable transfers reduce waste, cut rework, minimize downtime, and improve customer satisfaction. That translates into faster turnarounds, higher profit margins, and more predictable quality across every run. This guide covers the most common issues you’ll encounter in the DTF process, offering practical, field-tested tips and ready-to-apply fixes that align with proven troubleshooting approaches, checklists, and quick reference charts. You’ll learn how to prevent misalignment, poor adhesion, color dulling, and edge cracking, with step-by-step checks you can run in real-world shop conditions across different fabrics. By following targeted calibrations in pre-press, heat-press settings, and post-press care, you can convert fragile transfers into durable, repeatable results that satisfy customers and support your brand image.

Viewed from another angle, these challenges arise within the film-to-garment transfer workflow, where heat, pressure, moisture, and fabric interaction dictate success. In plain terms, this section acts as a practical glossary for direct-to-film decorations, reframing issues as transfer problems, alignment glitches, substrate compatibility, and cure timing to guide fixes. Using Latent Semantic Indexing principles, we connect related concepts such as DTF transfer issues, print reliability, heat press variables, and post-press care to help you diagnose symptoms and select the right parameter adjustments. By focusing on cotton, polyester blends, and synthetics, you build a repeatable process that keeps imagery sharp, colors vibrant, and durability intact through wear and washing.

Frequently Asked Questions

In DTF transfers troubleshooting, what are the most common DTF transfer issues and quick fixes for adhesion and alignment?

Common issues include misalignment, weak adhesion, color problems, and edge lifting. Quick fixes: verify adhesive curing (longer or hotter if the film looks dull); confirm heat press temperature, time, and pressure with manufacturer ranges and adjust in small steps; pre-press the garment 3–5 seconds to remove moisture; ensure correct backing placement with alignment marks and use even pressure; use the right pressing surface (teflon or silicone) and avoid shifting the transfer during application.

From a DTF printing troubleshooting perspective, how can I fix fading or washed-out colors after transfer?

Fading is usually due to improper curing or moisture issues. Fixes: use the correct curing temperature/time for the adhesive; verify print quality and resolution; confirm garment material and pre-treatment compatibility; minimize humidity in the work area; and follow care instructions after washing to preserve color vibrancy.

In DTF transfers troubleshooting, what causes ghosting or halos and how do I fix DTF transfer problems?

Ghosting or halos typically come from misalignment, bleed, or improper print density. Fixes: re-check alignment and ensure the transfer is flat and centered; verify bleed and contour settings and that ink density is appropriate; use a stable platen and avoid garment movement during pressing; confirm transfer film polarity if applicable.

What are some effective DTF heat press tips to improve transfer quality during DTF transfers troubleshooting?

DTF heat press tips: use a stable press with even pressure, set the correct temperature/time for the substrate, and pre-press to remove moisture; avoid moving the garment during pressing; use a protective cover sheet; test settings on a similar fabric and regularly calibrate color management for consistency.

How can I prevent cracking or edge lifting on stretch fabrics in DTF transfer problems during DTF transfers troubleshooting?

Prevent by avoiding over-stretching during handling and considering a longer pre-press for moisture removal; if the adhesive cures too aggressively, reduce press time or temperature; run a small fabric test to dial in settings; ensure even pressure across edges to prevent cracking.

What is a practical DTF heat press tips checklist for reliable results in DTF transfers troubleshooting?

Create a workflow plan per substrate (cotton, blends, synthetics) with reference temps/times/pressures; pre-press consistently; keep the press clean and free of debris; use quality films and powders from reputable suppliers; regularly calibrate printers and color management; log test prints and outcomes for future adjustments; run small tests before large runs; ensure backing removal and use a cover sheet to prevent platen sticking.

Category Key Points
DTF transfer process overview
  • Standard workflow involves printing a pigmented ink film, applying powder adhesive, curing the powder, then transferring the design to a garment using heat and pressure.
  • Common missteps include incorrect heat settings, inadequate curing, moisture in the fabric, and misalignment, which can lead to adhesion, color, or registration issues.
  • Most problems are fixable with targeted adjustments in preparation, press settings, and post-press care.
No transfer or incomplete adhesion
  • Issue: Design won’t adhere or only partially sticks.
  • Quick fixes:
    • Check transfer sheet quality and ensure adhesive powder cured; dull film or surface powder requires longer or hotter curing and fresh powder.
    • Verify heat press settings (temperature, time, pressure) and adjust incrementally using manufacturer ranges.
    • Pre-press the garment 3–5 seconds to remove moisture and wrinkles.
    • Check backing and pressing position with alignment marks; avoid shifting.
    • Use correct surface (teflon or silicone sheet) and ensure even pressure across the design.
Faded colors after transfer
  • Issue: Colors look less vivid or fade after washing.
  • Quick fixes:
    • Use proper curing time/temperature to bond adhesive without under-/over-curing.
    • Verify print quality and resolution for bright, durable colors.
    • Confirm garment material and pre-treatment compatibility (polyester blends vs. 100% cotton).
    • Avoid moisture in the work area to prevent ink adhesion/color issues.
    • Follow care instructions after washing; use mild detergents and avoid excessive heat.
Cracking, peeling, or edge lifting on stretch fabrics
  • Issue: Transfer cracks or peels at edges on flexed areas.
  • Quick fixes:
    • Avoid over-stretching; allow body stretch during transfer and during handling before pressing.
    • Consider reducing press time or temperature if adhesive cures too aggressively.
    • Longer pre-press for moisture removal on humid days.
    • Test on similar fabric to dial in settings before large runs.
Ghosting, halos, or blurred edges
  • Issue: Faint outlines or blurry edges after transfer.
  • Quick fixes:
    • Re-check alignment; ensure transfer is centered and flat.
    • Verify bleed/contour settings and ink density; ensure film isn’t skewing during curing.
    • Use a rigid heat press platen and avoid rapid garment movement during pressing.
    • Confirm transfer film polarity and correct side for transfer if applicable.
Transfer sticking to backing/platen
  • Issue: Design sticks to backing or adheres to the platen instead of fabric.
  • Quick fixes:
    • Apply even pressure; avoid excessive force that can cause film to stick to the platen.
    • Ensure backing is removed after pressing and garment is flat with no folds.
    • Check temperature/time; too much heat/long press can cause premature adhesion to unintended surfaces.
    • Use a protective cover sheet to prevent sticking to the platen for large designs.
White halos or color contamination around edges
  • Issue: White edging or color bleed near design.
  • Quick fixes:
    • Calibrate printer for color accuracy and precise registration.
    • Inspect adhesive powder quality and curing; inconsistent curing can cause halos.
    • Ensure artwork bleed area and transfer film cleanliness.
Ink bleed on certain fabrics
  • Issue: Ink spreads into fabric fibers, reducing sharpness.
  • Quick fixes:
    • Validate fabric type and set appropriate substrate-specific parameters.
    • Use compatible pre-treatment or fabric conditioner to control moisture and ink uptake.
    • Avoid over-wetting during pre-press and ensure film isn’t damp when pressing.
Post-wash peeling or edge lift
  • Issue: Transfer peels after washing or wear.
  • Quick fixes:
    • Ensure cure/bonding is complete before washing.
    • Use cold water washes and mild detergents; educate customers on care.
    • Reinforce edges with more pressure or longer initial press if needed for durability.
Best practices for reliable DTF transfers troubleshooting
  • Plan the workflow with substrate variability in mind (cotton, polyester, blends, synthetics). Create a reference table for temperatures, times, and pressures for common fabrics.
  • Pre-press consistently to remove moisture and wrinkles for better adhesion and registration.
  • Maintain a clean press and work area to avoid halos or defects.
  • Use quality films and powders from reputable suppliers to avoid inconsistency and rework.
  • Regularly calibrate printer and color management for accurate reproduction.
  • Keep a log of test prints and outcomes to document what works and drive improvements.
Practical troubleshooting checklist for common scenarios
  • Uneven adhesion across a design: Verify heat distribution, ensure even pressure, re-check pre-press; run a small substrate/adhesive powder test.
  • Faded colors after washing: Confirm curing temperature/time, inspect ink density, re-test on similar fabric; adjust pre-treatment if needed.
  • Edges peeling during wear: Ensure proper curing time, apply uniform pressure; review care instructions with customers.
  • Blurred edges or ghosting: Revisit alignment marks, ensure no movement during pressing, verify print resolution and bleed settings.
Advanced tips for DTF transfers troubleshooting
  • Fine-tune the transfer process with color profiles and ICC calibrations for consistent color reproduction.
  • Experiment with different adhesive powders to match film and substrate, especially on difficult fabrics.
  • For multi-layer designs, test for inter-layer interference and adjust timing between layers as needed.
  • Document every change in a standard operating procedure (SOP) for training and reference.
  • Consider a two-step transfer approach for challenging substrates: pre-apply a base layer and then apply the final design for complete coverage and adhesion.

houston dtf | georgia dtf | austin dtf transfers | san antonio dtf | california dtf transfers | texas dtf transfers |

© 2025 DTF Print Boost