
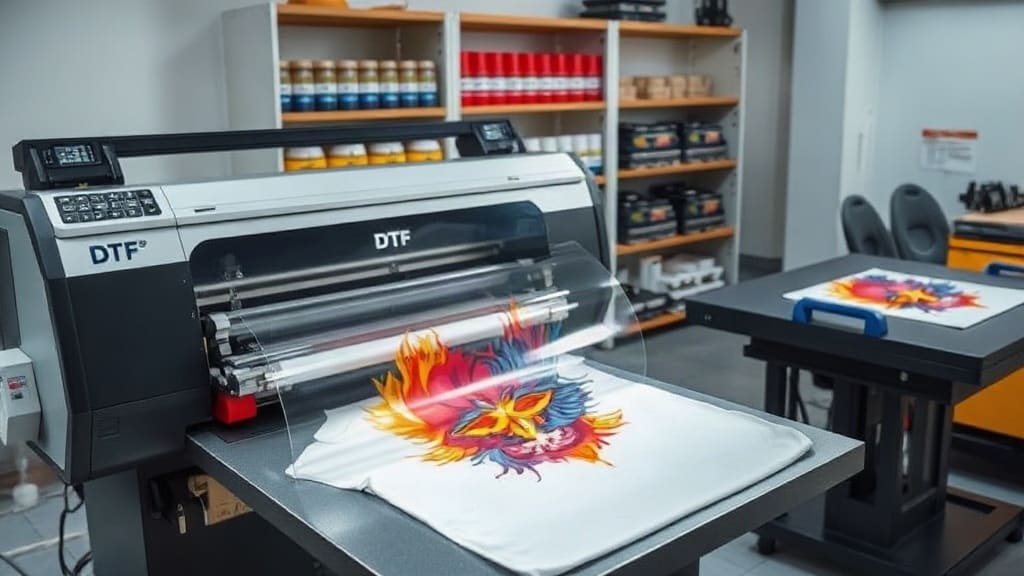
DTF printing, or Direct to Film printing, is taking the custom apparel world by storm. If you’ve been searching for a versatile and cost-effective way to create vibrant designs on various fabrics, you’ve likely stumbled upon this technology. Unlike traditional methods, DTF allows you to print your artwork onto a special film, then transfer it to a garment using heat and adhesive powder. The result is a soft, durable print that can handle complex colors and details without the need for screens or expensive setups.
In this comprehensive guide, we’ll walk you through every aspect of DTF printing, from the basics to advanced techniques. Whether you’re a hobbyist exploring new avenues or a business owner looking to expand services, you’ll find practical advice and actionable insights here. Let’s dive in.
What is DTF Printing and How Does It Work?
Direct to Film printing is a digital method that involves printing a design onto a special PET film using water-based or pigment inks. After printing, an adhesive powder is applied to the wet ink. The film is then heated to melt the powder, creating a strong bond between the ink and the powder. This prepared film is then placed on a garment and heat-pressed, transferring the design onto the fabric.
The process is quite straightforward, but it requires precision and the right equipment. Let’s break it down step by step:
- Design and Print: Using a DTF printer, you print your artwork in reverse (mirrored) onto the film. The printer uses CMYK plus white ink, allowing for vibrant colors and white underbases.
- Apply Adhesive Powder: While the ink is still wet, you sprinkle a special hot-melt adhesive powder over the printed area. The powder sticks only to the ink, not the bare film.
- Cure the Powder: The printed film is passed through a dryer or heat source to melt the powder, which fuses with the ink. This step ensures the powder is evenly distributed and ready for transfer.
- Transfer to Garment: Place the film on your shirt or fabric with the printed side down. Apply heat and pressure using a heat press. The adhesive melts again, bonding the ink to the fabric.
- Peel: After pressing, you can peel the film away either hot or cold, depending on the type of film and powder you use. The design stays on the fabric.
This method is similar to DTG (Direct to Garment) but offers more flexibility because you can print on a wider range of fabrics, including polyester, nylon, and blends that DTG often struggles with.
Essential Equipment and Materials for DTF
To start DTF printing, you’ll need the following items:
DTF Printer
You can either modify an existing inkjet printer or purchase a dedicated DTF printer. Many people use Epson or Ricoh printers that have been converted, but dedicated models come with features like built-in white ink circulation to prevent clogging. Invest in a printer that supports pigment inks and has a robust printhead.
DTF Film
There are two types of film: PET (polyethylene terephthalate) and BOPP (biaxially oriented polypropylene). PET is more common and provides better ink absorption. Choose a film that is compatible with your printer and has the right coating for optimal results.
Inks
DTF uses water-based pigment inks, including white ink. White ink is crucial for printing on dark fabrics because it provides an opaque base. Ensure you use high-quality inks to avoid color fading and clogging.
Adhesive Powder
This powder comes in different particle sizes and melting points. Finer powder works well for detailed designs, while coarser powder is better for thicker fabrics. You’ll need a powder shaker or a powder applicator to apply it evenly.
Heat Press
A heat press is essential for transferring the design. You can use a clamshell or swing-away press, but ensure it provides even pressure and temperature control. For beginners, a basic model will do, but for production, consider a pneumatic press.
Computer and RIP Software
You’ll need a computer with design software and a RIP (Raster Image Processor) to control your printer. RIP software manages color profiles and white ink layers, ensuring accurate prints.
Advantages and Disadvantages of DTF Printing
Like any printing method, DTF has its pros and cons. Understanding them helps you decide if it’s the right fit for your projects.
Pros
- Versatile: Works on cotton, polyester, blends, and even leather or nylon.
- High Detail: Can print intricate designs with gradients and fine lines.
- No Screen Setup: Perfect for small runs or one-off items.
- Soft Feel: The transfers have a soft hand, similar to screen printing but thinner.
- Durability: DTF prints can withstand many washes without cracking.
Cons
- Initial Investment: Equipment can be pricey, especially if you buy a dedicated DTF printer.
- Learning Curve: You need to master the powder application and curing process.
- Less Stretchable: The print may not stretch as well as screen printing, so avoid using on highly elastic fabrics.
- Film Waste: You have to cut out the prints, which leaves wasted film around the design.
Despite the drawbacks, many printers find DTF to be a lucrative addition to their services, especially for on-demand orders.
Step-by-Step Guide to Making Your First DTF Transfer
Let’s walk through the process of creating a simple transfer from start to finish. This hands-on approach will give you confidence.
1. Prepare Your Design
Create or choose your artwork in a software like Photoshop or Illustrator. Ensure the resolution is at least 300 DPI. If your design includes text, remember to mirror it before printing. Most RIP software has an option to mirror automatically.
2. Set Up Your Printer
Load the PET film into the printer, making sure it’s the correct side (the coated side should face up). Configure your RIP software with the right color profile and print settings, such as print quality and white ink opacity.
3. Print Your Design
Send the file to print. The printer will lay down CMYK colors and then white ink as an underbase for dark fabrics. For light fabrics, you might not need white, but it can still be used to enhance colors.
4. Apply Adhesive Powder
Immediately after printing, while the ink is still wet, sprinkle a generous amount of DTF adhesive powder over the printed area. Use a shaker for even distribution, then shake off the excess powder. Ensure you cover all ink areas thoroughly.
5. Cure the Powder
You can cure the powder using a heat press or an oven. If using a heat press, set it to around 160°C (320°F) and press the film for about 30 seconds with light pressure. Alternatively, a dedicated powder curing oven provides consistent results.
6. Cut Out Your Transfer
Using scissors or a cutting machine, cut around your design, leaving a small border. This makes handling easier.
7. Heat Press the Transfer
Preheat your garment for a few seconds to remove wrinkles. Place the transfer on the garment with the printed side down. Use a heat press at 160°C (320°F) with medium to firm pressure for 15-20 seconds. For best results, use a silicone sheet or Teflon paper to protect the film.
8. Peel and Finish
After pressing, peel the film away. You can do a hot peel or cold peel; check your film’s specifications. Hot peel is often quicker, but cold peel can be safer for some designs. Once peeled, your transfer is complete!
Now you have a vibrant, durable print that rivals other methods. Practice makes perfect, so don’t be discouraged if your first few attempts aren’t flawless.
Tips for Perfect DTF Transfers Every Time
Achieving consistent, high-quality prints requires attention to detail. Here are some expert tips:
- Calibrate Your Printer: Regularly run nozzle checks and cleanings to prevent clogging, especially with white ink.
- Use a Dryer: If you’re producing in bulk, invest in a conveyor dryer to cure the powder uniformly. This avoids scorching the film.
- Store Materials Properly: Keep your film in a cool, dry place to prevent moisture absorption, which can affect ink adhesion.
- Test on Different Fabrics: Each fabric type may require different time and temperature settings. Keep a log of what works best.
- Handle Transfers with Clean Hands: Oils and dirt can affect the adhesive powder, so wear gloves or handle by the edges.
- Pressure Matters: Too little pressure will result in a weak bond; too much can cause ghosting or bleeding. Find the sweet spot for your press.
Common DTF Problems and How to Fix Them
Even seasoned printers encounter issues. Here are some frequent problems and their solutions:
Print Looks Washed Out
This often happens when you don’t use enough white ink or the white layer is too thin. Increase the white ink density in your RIP settings. Also, ensure you’re printing on the correct side of the film.
Powder Not Sticking
If the powder isn’t adhering to the ink, it might be because the ink has dried before you applied the powder. Work quickly and apply powder immediately after printing. Also, check that you’re using compatible powder for your ink type.
Transfer Cracks After Washing
Cracking occurs when the adhesive isn’t fully cured or the transfer is stretched. Ensure you cure the powder thoroughly and avoid over-stretching the fabric. Also, use a lower temperature with longer time for stretchy fabrics.
Film Sticks to Garment
If the film doesn’t release cleanly, it might be due to excessive heat or pressure. Try a cooler peel or reduce pressure. Also, check that the film is compatible with your heat press.
White Ink Clogging
White ink is prone to settling and clogging. Keep your printer on a regular cleaning cycle, and if you don’t use it daily, shake the ink cartridges and run a cleaning cycle before printing.
DTF vs. DTG: Which Is Better?
One common question is how DTF compares to Direct to Garment printing. Both have their strengths, but they serve different needs.
DTG prints directly onto the shirt, which means there’s no film or powder. It’s excellent for soft prints and works best on 100% cotton. However, DTG printers are expensive and require regular maintenance. They also struggle with polyester because the ink doesn’t bond well with synthetic fibers.
On the other hand, DTF works on almost any fabric, including polyester blends, which makes it ideal for sportswear and promotional items. The process is also faster for small orders because you can pre-print transfers and press them on demand. However, the feel of a DTF print is slightly thicker than DTG, and the initial setup cost can be similar if you buy a quality printer.
In my experience, many businesses use both methods: DTG for cotton garments and DTF for everything else. This hybrid approach maximizes versatility.
Cost Analysis of DTF Printing
Is DTF printing profitable? Let’s break down the costs and potential returns.
Initial Investment
A dedicated DTF printer can cost anywhere from $2,000 to $8,000. Add a heat press ($300 to $1,000), a powder applicator and curing unit (if you don’t use your heat press), and other accessories, and you might spend between $3,000 and $10,000 to start.
Per-Transfer Costs
The cost per transfer includes film, ink, and powder. On average, a single A3-sized transfer might cost $1.50 to $3.00 in materials, depending on ink coverage and film quality. For a T-shirt, you might use a smaller transfer, so the material cost could be as low as $0.50.
Pricing Your Products
When pricing, you need to cover your overhead, time, and profit margin. Many print shops charge $8 to $15 for a custom T-shirt, which leaves a healthy profit after subtracting material costs. If you’re doing small runs, DTF is cost-effective because there’s no screen setup fee.
Frequently Asked Questions About DTF Printing
What is the best DTF film?
The best film depends on your printer and usage. PET film is the most popular because it’s durable and provides excellent ink adhesion. Brands like DTF Superstore and Printful offer reliable options. Always test a few brands to see which works best with your ink and powder.
Can DTF transfers be used on any fabric?
Yes, DTF transfers work on cotton, polyester, nylon, leather, and blends. The key is to adjust your heat press settings based on the fabric’s tolerance. For example, polyester requires lower temperatures to avoid melting, so you might need to press for a longer time.
How long do DTF prints last?
With proper care, DTF prints can last for hundreds of washes. They are resistant to cracking and fading, especially when using high-quality inks and powders. To extend the life, wash garments inside out in cold water and avoid using bleach.
Can I use a regular inkjet printer for DTF?
You can convert some inkjet printers, like Epson EcoTank models, for DTF use. However, you’ll need to replace the inks with DTF pigment inks and install a white ink circulation system. This is a more budget-friendly option for beginners, but it requires technical skill and may void the printer’s warranty.
Do I need a special heat press for DTF?
No, a standard heat press is sufficient. You just need to ensure that it can reach temperatures up to 200°C (392°F) and provide even pressure. Some printers use a heat press for both curing the powder and transferring, which works well if you have only one press.
Conclusion
DTF printing is a game-changer in the custom apparel industry. Its versatility, cost-effectiveness, and ease of use make it an attractive option for startups and established businesses alike. By understanding the process, investing in good equipment, and honing your skills, you can produce professional-quality prints that delight your customers.
Remember, success comes with practice. Start with simple designs, keep detailed records of your settings, and don’t be afraid to experiment. Before you know it, you’ll be creating stunning DTF transfers that stand out in the market.
If you’re ready to take the plunge, consider sourcing your materials from reputable suppliers like DTF Print Boost, where you can find reliable films, inks, and powders to kickstart your journey.